-->

Tuesday, November 26, 2013

Cranberry Sauce with Rapadura | Recipes


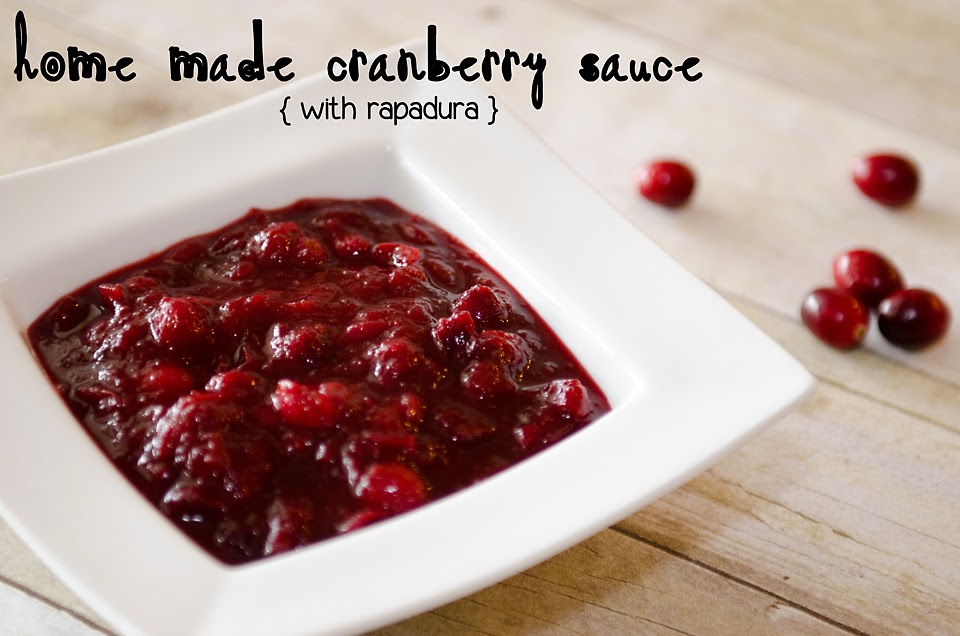
This is the easiest cranberry sauce you'll ever make, and SO much better than the can stuff that's filled with high fructose corn syrup! The sweetener for this cranberry sauce is rapadura.  Rapadura is a raw, wholegrain cane sugar that is unrefined and unbleached.  It is not separated from the molasses and is not subject to heat at high temperatures and therefore retains many of the natural vitamins and minerals. A friend recently introduced me to rapadura, and it worked as a perfect sweetener in this dish.  

Ingredients:
1 12-ounce bag of cranberries
1/2 cup water
1/2 cup fresh squeezed orange juice
2/3 cup of Rapadura Organic Whole Sugar
 

1/4 tsp cinnamon
1/8 tsp salt

Bring all ingredients to a boil in a saucepan, and then simmer on low heat for 15-20 minutes.  You will notice the cranberries starting to pop open and the sauce will thicken slightly as it cooks.  As it cools, the cranberry sauce will thicken more.  Cool completely in the fridge before serving.  Enjoy!


Saturday, October 26, 2013

Chocolate Chip Almond Flour Pancakes | Gluten Free | Refined Sugar Free

I find that gluten free pancake mixes can taste a little gritty. This prompted my search for a simple, better tasting, better ingredient, homemade pancake recipe. We love these pancakes in our house. The syrup is already baked in! I make a batch of these, and then reheat them in the toaster oven throughout the week :)

Yields 8-9 pancakes

Ingredients:
1 cup blanched almond flour (I use Honeyville Blanched Almond Flour)
1/2 tsp baking soda
pinch of salt
1 tsp flaxseed meal (I use Bob's Red Mill Organic Flaxseed Meal)
1/4 cup plain unsweetened almond milk
1/8 cup Nutiva Organic Extra Virgin Coconut Oil

1/8 cup pure maple syrup
3 eggs
1/2 - 1/3 cup Enjoy Life Semi-Sweet Mini Chocolate Chips


Mix the dry ingredients then add in the wet ingredients. Add the chocolate chips last. In a medium high heat non-stick pan, pour in the mix as you would regular pancakes. These take a little longer to cook, and do not bubble up on the top. I like to shake the pan a little to see if the tops are set. When they are set, then flip carefully!


Thursday, October 17, 2013

Not So Corporate Headshots | Sarah Garcia | Bradenton Photographer

Sarah is a licensed mental health counselor. She works with children, teens and adults. She provides individual, family, and couples psychotherapy. She has training in Post Traumatic Stress Disorder, sexual abuse and sexual assault, anxiety, addictions, Bi-Polar disorder, Autism Spectrum disorders, depression, grief and loss, behavior management, parenting and ADHD. 

Not only is Sarah a highly trained counselor, she is also one of the sweetest women I have ever met. She has such a warm and caring demeanor. And she is a mom to 2 respectful, smart and adorable young children.

The owners at Riverside Bed and Breakfast in Palmetto were kind enough to let us use their property for this photo session. Sarah and I toured the inside of the B&B and were in awe of the amazingly beautiful rooms and views that overlook the river in this historic property.


Friends provide advice, therapy works towards solutions. 
Sarah D. Garcia, LMHC

Friday, October 11, 2013

Domenico | Bradenton Family Photographer | 5 Year Old Session

Domenico has a future in modeling.  I can already picture him in a JCrew Cuts or Gap Kids ad ;)

A little Halloween preview

I love to do pictures of my kids in their Halloween costumes BEFORE Halloween night.  It takes the pressure off and lets me be in the moment and enjoy the night, rather than worrying about capturing the perfect picture. As fun as Halloween is, it can also be a little stressful, getting the kids home from school, homework done, dinner, costumes on and ready to go. I love knowing I already have pictures of them in the costumes I worked so hard on :)  A few candid pictures on Halloween night, and I'm all set.

I'll be posting a tutorial soon for Ethan's Stegosaurus costume. He loves it! For Emily's costume, we ordered the dress from Amazon, and then added all the details. She loved decorating the purse and making a necklace :)

Kid Approved Pumpkin Pie | Gluten Free | Sugar Free


My friend challenged me to find a gluten free pumpkin pie recipe. I think I did pretty well with it! My kids love it, and practically licked their plates clean! 

I used this recipe for the filling:

I used an 11 inch pie pan, and pricked the dough so that it would not puff up when it baked.  I baked it for 5 minutes, let it cool, then put it in the freezer for 30 minutes.

For the filling, I used a 15 oz can of Trader Joes Organic Pumpkin. I used 1 TBS of pumpkin pie spice instead of the combo of spices (but still added a little fresh lemon zest), and used Grade A maple syrup instead of Grade B. I used these awesome Wilton Bake Even Stripswhen baking the pie so that it baked evenly, and it only need 30 minutes in the oven.


I can't wait to make this again for Thanksgiving!


Friday, October 4, 2013

Let's Click! Workshop | 2013

I am happy to report that our first Let's Click! Workshop was a great success! Maggie and I want to thank the wonderful ladies who participated. We had an awesome group of women who were ready to dive in and learn how to shoot in manual. We discussed so much, from the exposure triangle, to 'finding the light', to editing software and more. Our practice photo session at the end of the day was key in putting newly learned skills to the test. We look forward to keeping in touch and continuing to learn from each other through the Let's Click facebook group.

One question that came up was about camera bodies and the benefits of a newer or upgraded body. I found this awesome post written by another photographer and mom from California who also teaches workshops, that perfectly answers this question.

Maggie and I are already looking at dates for the next Let's Click!

A few photos from the day...

 I love wreaths ;)
 
Snacks to start the day. We ended the workshop with an amazing dinner made by Maggie! She promises to share her pulled pork recipe :)
 Our Let's Try It area
 And finally, the practice session with our awesome models!


Wednesday, October 2, 2013

So Simple Sweet Potato Soup | Gluten Free


This soup is perfect for Fall weather afternoons, that will hopefully make it to FL soon ;). It is so simple to make, and so delicious. The ingredient amounts don't have to be exact. I find that I sometimes add in a little more vegetable broth at the end if it's too thick. And you can add more/less salt and pepper to taste.

Ingredients:
2 large sweet potatoes
2 TBS extra virgin olive oil (I use Bariani Extra Virgin Olive Oil - it's the only olive oil that is truly cold-processed from start to finish, therefore retaining the most nutrients)
3 cloves garlic, minced
1/2 onion, diced
1 TBS salt
1/2 tsp fresh ground black pepper
2 1/2 cups vegetable stock (Make sure your stock is gluten free, there are several out there that are not! I use Pacific Organic Vegetable Broth or Trader Joes)
1/2 cup heavy cream

Peel and cube the sweet potatoes, and boil them until they are tender and mashable. While the sweet potatoes are boiling, saute the onion and garlic in olive oil. Add the salt and pepper. Drain the sweet potatoes and put them back into the hot pot. Add the vegetable stock, and sauteed onions and garlic. Use an immersion blender to blend the soup until smooth. Add the cream, and heat through, about another 10 minutes.

Enjoy!

Tuesday, September 24, 2013

Natural light product photography and Christmas stockings


Confused by the title? Hopefully not for long! My mom and I run an Etsy shop, Little Buddy Designs, selling hand knit Christmas stockings. We've had the shop for 4 years. She knits the stockings, and I do the finishing work, photography for the listings and handle customer service. All year my mom knits stockings to build our inventory. She hands them over to me, and I prep them for sale. This is our busiest time of year. You might catch me in carline duplicate stitching names onto stockings ;). 

Here is an inside look at how I photograph them using natural light.

I use white seamless paper and lay it across my dining room table.
I set up in front of a window to get the most natural light.
I use a reflector to bounce the light back onto the stocking, so the lighting is even. I balance the reflector against our light fixture (you can see it in the mirror). I could also use my backdrop stand and hang the paper from it, but I find it quicker and easier to use my reflector. I make sure I'm not standing directly in front of the window when I'm photographing the stockings, so that I'm not blocking the light.
I lightly edit all of the photos by adjusting the white balance, adding brightness and adding contrast.  I do all of this in Adobe Camera Raw. The edit is subtle, as I find it important to get it right in camera.
Have an Etsy shop too? Make sure you're using the Etsy iPhone app - it makes a fun cash register sound whenever there's a sale!

Thursday, September 19, 2013

Berry Cobbler | Gluten Free | Sugar Free

This mixed berry cobbler is super simple and quick to make. You can use any combination of fresh or frozen berries. I've made fresh strawberry and raspberry cobbler, and pictured here is a frozen berry mix of strawberry, raspberry, blackberry and blueberry (Trader Joes, of course ;) ). Adapted and slightly modified from this recipe.

Filling:
about 2 cups of berries (I use 1 bag of frozen mixed berries)
1/2 TBS Nutiva Organic Extra Virgin Coconut Oil 
1 tsp lemon juice

Cobbler:
1/4 cup Bob's Red Mill Organic Coconut Flour 
1/8 tsp cinnamon
1/2 tsp baking soda
1/8 tsp salt
2 eggs
1/8 cup Nutiva Organic Extra Virgin Coconut Oil
1/8 cup raw honey
1/4 almond milk
1 tsp vanilla extract

Mix together the filling ingredients. If you use frozen berries, heat them slightly so you can cut up the larger berries. Pour the mixture evenly between 2 small circle baking dishes. Mix the cobbler dry ingredients in 1 bowl and the wet ingredients in another. Combine the wet and dry ingredients. Spoon half the cobbler mixture over the berries in each baking dish, and smooth evenly over the top. Bake at 350 for 30 minutes. Enjoy!

The cobbler is delicious topped with whipped cream or frozen yogurt ;)

Find me on Instagram and Facebook
:)